What Is Metal Stamping? A Complete Guide to the Process
Metal stamping is a manufacturing process that converts flat metal sheets or coils into specific shapes using a stamping press and die tooling. It handles everything from simple brackets to complex, multi-feature automotive connectors — at volumes ranging from a few thousand parts per year to millions per hour.
If you are evaluating metal stamping for a new component or trying to understand whether your current supplier’s process matches your tolerances, this guide gives you the technical fundamentals, process comparisons, and material data you need to make informed sourcing decisions.
You will learn:
- How the metal stamping process works, step by step
- The difference between progressive, transfer, and fourslide stamping
- Tolerance ranges, tonnage requirements, and material formability limits
- Which industries rely on stamping and why
- How to specify stamped parts and avoid common design mistakes
What Is Metal Stamping?
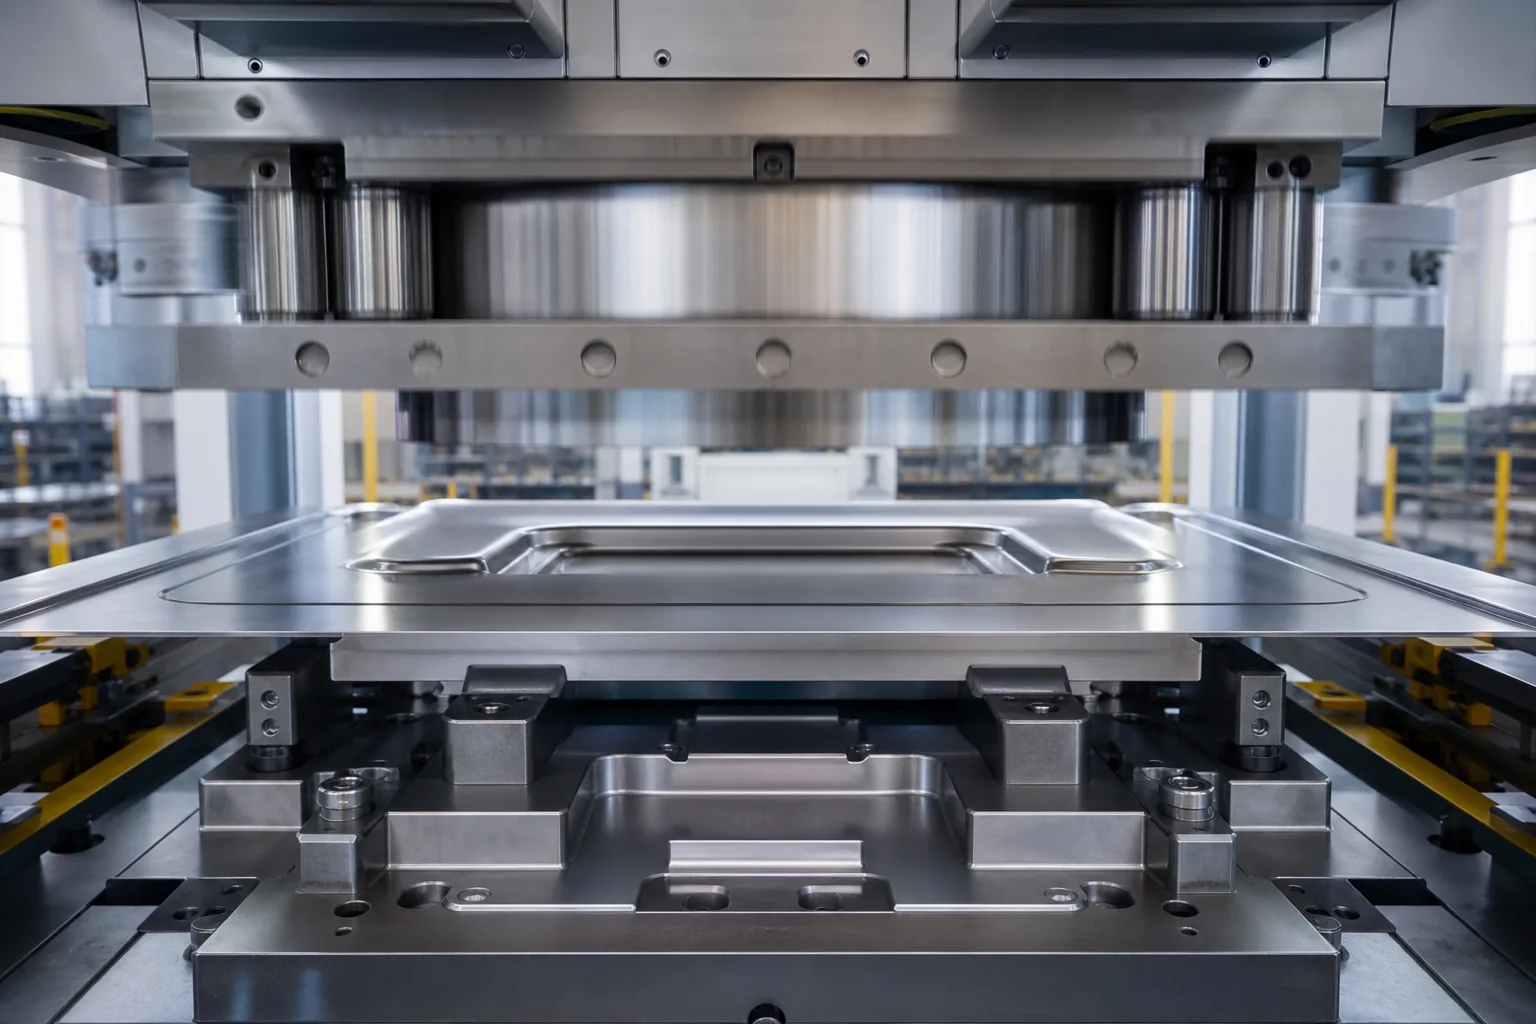
Metal stamping is a cold-forming process that uses a press and matched tooling (a die set) to shape flat metal stock — sheet, strip, or coil — into a finished or semi-finished part. The press applies force, typically between 5 and 2,000 tons, to drive the upper die into the lower die, cutting, bending, or drawing the metal into the desired geometry.
Stamping is not a single operation. It is a family of operations — blanking, piercing, bending, forming, drawing, coining, and embossing — that can be combined in a single die set or spread across multiple stations. The choice depends on part complexity, volume, and tolerance requirements.
Compared to CNC machining, stamping produces parts faster (cycle times of 0.5–2 seconds per hit) and at lower per-unit cost at volumes above ~10,000 pieces. Compared to casting or forging, stamping works with thinner stock (typically 0.1–6 mm) and achieves tighter tolerances on flat and bent features.
How the Metal Stamping Process Works
A metal stamping operation follows a consistent sequence regardless of the specific die type:
Step 1: Material Feeding
Coil stock is loaded onto an uncoiler (decoiler) and fed through a straightener to remove coil set — the curvature introduced during coiling. The strip then enters a feeder, which advances the material into the press in precise increments called the feed pitch. Servo-driven feeders achieve feed accuracy of ±0.05 mm.
Step 2: Die Operation
The press ram descends and drives the upper die half into the lower die half. Depending on the die station, one or more of these operations occur:
| Operation | What It Does | Typical Tolerance |
|---|---|---|
| Blanking | Cuts the outer profile from the strip | ±0.05–0.10 mm |
| Piercing | Punches holes, slots, or cutouts | ±0.05 mm |
| Bending | Forms angles along a straight axis | ±0.5° angular |
| Drawing | Stretches metal into a cup or cavity | ±0.10–0.25 mm depth |
| Coining | Compresses metal to create precise features | ±0.025 mm |
| Forming | Creates 3D contours without stretching | ±0.10 mm |
Step 3: Part Ejection and Scrap Management
Finished parts are separated from the carrier strip. In progressive dies, parts remain attached to the strip until the final station, where a cutoff punch separates them. Scrap skeleton (the remaining strip) is wound onto a scrap reel or chopped and conveyed to a bin.
Step 4: Secondary Operations (If Required)
Parts may move to secondary operations such as deburring, tapping, welding, plating, heat treatment, or assembly. Designing features into the die — such as in-die tapping or staking — reduces handling and cost.
Types of Metal Stamping
Progressive Die Stamping
Progressive die stamping is the highest-volume stamping method. A single die set contains multiple stations arranged in a line. Each station performs one or more operations as the strip advances through the die on each press stroke.
Key characteristics:
- Cycle rate: 60–1,500 strokes per minute (SPM)
- Part complexity: Medium to high (10–30+ operations in one die)
- Typical volumes: 100,000 to 50+ million parts per year
- Material utilization: 70–85%, depending on strip layout
- Die cost: $15,000–$250,000+ depending on complexity
Progressive stamping suits small-to-medium parts that need multiple features: electrical contacts, connector pins, lead frames, clips, and brackets. A 20-station progressive die running at 300 SPM on a 60-ton press can produce 18,000 finished parts per hour.
Transfer Die Stamping
Transfer stamping uses a series of individual dies arranged in a press or press line. A mechanical transfer system (fingers or shuttle) moves the part from station to station. Unlike progressive stamping, the part is completely separated from the strip at the first station.
Key characteristics:
- Cycle rate: 15–60 SPM
- Part complexity: High (deep draws, large parts)
- Typical volumes: 10,000 to 1,000,000 parts per year
- Part size range: Up to 500 mm × 500 mm or larger
- Die cost: $50,000–$500,000+
Transfer stamping handles parts too large or too deep for progressive dies — automotive body panels, appliance housings, and deep-drawn shells. The independent station design allows deeper draws (draw ratios up to 2.0:1 in a single operation) because each station can be optimized independently.
Fourslide (Four-Slide) Stamping
Fourslide stamping combines stamping and wire forming in a single machine. Four slides approach the part from different angles, bending wire or flat stock into complex 3D shapes.
Key characteristics:
- Cycle rate: 30–300 SPM
- Part complexity: Very high for wire forms, medium for flat stampings
- Typical volumes: 50,000 to 50+ million parts per year
- Wire diameter range: 0.2–6.0 mm
- Flat stock thickness: 0.1–3.0 mm
Fourslide machines produce clips, springs, contacts, and wire forms that require bends in multiple planes — shapes that would need multiple secondary operations if made on a conventional press.
Comparison: Progressive vs. Transfer vs. Fourslide
| Factor | Progressive | Transfer | Fourslide |
|---|---|---|---|
| Max strokes/min | 1,500 | 60 | 300 |
| Deep draw capability | Limited (≤0.5:1 per station) | Excellent (2.0:1) | Poor |
| Part size | Small to medium (≤300 mm) | Medium to large (≤500 mm+) | Small (≤150 mm) |
| Multi-plane bends | No | No | Yes |
| Die cost (typical) | $15K–$250K | $50K–$500K | $5K–$80K |
| Best for | High-volume flat/small parts | Large or deep-drawn parts | Wire forms, complex clips |
| Scrap rate | 15–30% | 10–25% | 5–15% |
Tolerances and Precision in Metal Stamping
Achievable tolerances depend on material type, thickness, part geometry, die quality, and press condition. The table below shows typical and precision ranges for common features:
| Feature | Standard Tolerance | Precision Tolerance | Notes |
|---|---|---|---|
| Linear dimensions | ±0.10 mm | ±0.025 mm | Die clearance and material springback affect results |
| Hole diameter | ±0.05 mm | ±0.013 mm | Punch-to-die clearance is the primary variable |
| Hole position | ±0.10 mm | ±0.025 mm | Progressive die alignment matters most |
| Bend angle | ±1.0° | ±0.25° | Material grain direction affects springback |
| Flatness | 0.10 mm/25 mm | 0.025 mm/25 mm | Stress relief and die design are critical |
| Burr height | 0.10 mm max | 0.03 mm max | Tool sharpness and clearance control |
Practical note: Specifying tolerances tighter than ±0.025 mm on stamped parts adds significant cost — often 30–100% over standard tolerance pricing — because it requires precision-ground tooling, frequent die maintenance, and 100% inspection. Specify precision tolerances only on features that functionally require them.
What Affects Tolerance Capability
- Material thickness and type: Thinner, softer materials (aluminum, copper) hold tighter tolerances more easily than thick, high-strength steel.
- Die construction: Wire EDM-cut die sections hold ±0.013 mm; conventional machining typically holds ±0.05 mm.
- Press condition: Worn press gibs or excessive ram tilt (>0.05 mm over full stroke) degrade tolerances at every station.
- Strip layout: Symmetrical layouts reduce lateral forces and improve dimensional consistency.
Materials Used in Metal Stamping
Nearly any ductile metal can be stamped. Material selection depends on the part’s strength, conductivity, corrosion resistance, and cost requirements.
| Material | Typical Thickness | Tensile Strength | Key Properties | Common Applications |
|---|---|---|---|---|
| Low-carbon steel (SPCC, DC01) | 0.3–6.0 mm | 270–410 MPa | Low cost, good formability | Brackets, enclosures, structural parts |
| Stainless steel (304, 316, 430) | 0.2–3.0 mm | 515–620 MPa | Corrosion resistance | Medical devices, food equipment, marine hardware |
| Aluminum (5052, 6061) | 0.2–4.0 mm | 190–310 MPa | Lightweight, conductive | EV battery contacts, aerospace panels, heat sinks |
| Copper (C110) | 0.1–2.0 mm | 210–380 MPa | High electrical conductivity | Electrical connectors, bus bars, terminals |
| Brass (C260) | 0.2–3.0 mm | 300–420 MPa | Good formability, decorative | Connectors, hardware, decorative trim |
| Phosphor bronze (C510) | 0.1–1.5 mm | 380–620 MPa | Spring properties | Electrical contacts, springs, clips |
| High-strength low-alloy (HSLA) | 0.5–4.0 mm | 450–700 MPa | High strength-to-weight | Automotive structural, seat components |
| Titanium (Grade 2, Grade 5) | 0.3–2.0 mm | 345–895 MPa | Strength, corrosion resistance | Aerospace, medical implants |
Material Selection Tips
- Formability rating: Use the r-value (plastic strain ratio) to assess deep-draw capability. Low-carbon steel (r = 1.5–2.0) draws better than aluminum (r = 0.6–1.0). Higher r-values mean the material resists thinning during drawing.
- Work hardening: Austenitic stainless steels (304, 316) work-harden rapidly, increasing springback and die wear. Plan for ~10–20% strength increase after forming.
- Surface finish: Electrogalvanized and hot-dipped galvanized steels require die coatings (TiN or DLC) to prevent galling. Bare stainless also galls without lubrication or coated tooling.
Press Tonnage and Equipment Selection
Selecting the right press tonnage is critical. Undersized presses stall or produce inconsistent parts; oversized presses waste energy and reduce stroke control.
How to Estimate Required Tonnage
Blanking and piercing formula:
Tonnage = (Perimeter × Thickness × Shear Strength) ÷ 2,000
Where perimeter is in mm, thickness in mm, and shear strength in MPa. The divisor converts Newtons to metric tons.
Example: Blanking a 50 mm × 30 mm rectangular part from 1.0 mm thick low-carbon steel (shear strength ≈ 310 MPa):
Perimeter = 2 × (50 + 30) = 160 mm
Tonnage = (160 × 1.0 × 310) ÷ 2,000 = 24.8 tons
Add 20–30% for stripping force and die friction → ~32 tons minimum press capacity.
Bending formula:
Tonnage = (Length × Thickness² × Tensile Strength × K-factor) ÷ (Die opening × 2,000)
K-factor typically ranges from 1.0 to 1.3 depending on die type (air bending, bottoming, or coining).
Common Press Types
| Press Type | Tonnage Range | Stroke Rate | Best For |
|---|---|---|---|
| Mechanical crank press | 5–2,000 tons | 30–1,500 SPM | Progressive and transfer stamping |
| Hydraulic press | 50–10,000 tons | 5–30 SPM | Deep drawing, forming, large parts |
| Servo press | 30–800 tons | Adjustable | Precision forming, complex curves |
| Mechanical straight-side | 100–5,000 tons | 15–100 SPM | Transfer dies, large automotive parts |
Industry Applications of Metal Stamping
Automotive
The automotive industry consumes roughly 40–50% of all stamped metal parts globally. A typical passenger vehicle contains 300–500 stamped components, from structural body panels (hoods, doors, fenders) to small precision parts (seat belt brackets, electrical terminals, fuel injector housings).
High-strength steel stampings have grown significantly since 2015 as automakers reduce vehicle weight to meet fuel economy targets. DP980 and DP1180 dual-phase steels require 20–40% more press tonnage than mild steel but deliver 2–4× the strength at the same thickness.
Electronics and Electrical
Connector pins, lead frames, EMI shielding cans, heat sinks, and battery contacts are produced through precision progressive stamping. Lead frames for semiconductor packages may require ±0.01 mm positional tolerance on 0.15 mm thick copper alloy.
The shift to electric vehicles has accelerated demand for copper and aluminum bus bar stampings — typically 2–5 mm thick, with hole patterns toleranced to ±0.05 mm for bolt-up assembly.
Aerospace
Aerospace stampings use titanium, Inconel, and aluminum-lithium alloys. Parts include brackets, clips, ribs, and panels. The FAA requires material traceability and process validation (PPAP or equivalent) for flight-critical stampings.
Medical
Surgical instruments, implant components (titanium), and device housings (stainless steel) require cleanroom-compatible stamping with full material certification. Burr-free edges are mandatory — secondary deburring or in-die shaving operations add cost but eliminate the risk of particulate contamination.
Appliances and HVAC
Larger stampings — motor housings, fan blades, ductwork fittings, and structural supports — often use transfer dies on hydraulic presses. Volumes are moderate (10,000–500,000/year), and part sizes range from 100 mm to 500+ mm.
Designing Parts for Metal Stamping
Designing for manufacturability (DFM) reduces die cost, improves part quality, and shortens lead time. These guidelines apply to most stamping projects:
Wall Thickness and Features
- Maintain uniform wall thickness wherever possible. Sudden changes in thickness cause uneven material flow and cracking.
- Minimum web width between holes: ≥2× material thickness (≥1× for short runs with hardened tooling).
- Minimum hole diameter: ≥ material thickness. Holes smaller than 80% of material thickness require reinforced punches to prevent breakage.
Bend Radii
- Inner bend radius should be ≥1× material thickness for mild steel, ≥1.5× for stainless, and ≥2× for aluminum to prevent cracking.
- Place bends perpendicular to the rolling direction when possible — bending parallel to grain increases cracking risk by 30–50%.
- Offset bends (Z-bends) should have a flange height ≥4× material thickness plus the bend radius.
Relief and Corner Design
- Add corner reliefs (notches or radius cuts) where two flanges meet to prevent tearing.
- Minimum corner radius: ≥0.5 mm for sharp-corner dies, ≥1.0 mm for long-run production dies.
- Edge-to-hole distance: ≥ material thickness + 1.5 mm to prevent distortion.
Tolerance Strategy
- Apply the widest tolerance that meets function — every ±0.01 mm of tolerance you tighten costs real money.
- Key locating features (datum holes, edges) should hold ±0.05 mm. Non-critical cosmetic edges can tolerate ±0.15 mm or more.
- If your part has one or two features tighter than ±0.05 mm, consider secondary machining on those features rather than holding the entire die to that spec.
Progressive Die Stamping vs. Other Manufacturing Methods
When should you choose stamping over CNC machining, laser cutting, or die casting? The answer depends on volume, part geometry, and material.
| Factor | Progressive Stamping | CNC Machining | Laser Cutting + Bending | Die Casting |
|---|---|---|---|---|
| Per-unit cost at 100K+ | Lowest | Highest | Moderate | Low (for 3D shapes) |
| Tooling investment | $15K–$250K | Minimal ($0–$5K for fixtures) | Minimal | $50K–$300K |
| Part thickness range | 0.1–6.0 mm | 0.5–100+ mm | 0.5–25 mm | 1.0–10 mm |
| Tolerances | ±0.025–0.10 mm | ±0.005–0.025 mm | ±0.10 mm | ±0.10–0.25 mm |
| Material waste | 15–30% (skeleton) | 20–80% (swarf) | 5–15% | 2–5% (runner/gate) |
| Secondary operations | Minimal (in-die) | Often none needed | Bending, welding required | Machining on critical surfaces |
| Best volume range | 10,000–50M+ | 1–10,000 | 1–50,000 | 5,000–1M |
Key insight: The breakeven volume where progressive stamping becomes cheaper than laser-cut-and-bent parts is typically 5,000–15,000 units, depending on part complexity. Below that range, laser cutting with press brake bending is usually more cost-effective because it avoids tooling investment.
Quality Control in Metal Stamping
Production stamping operations use multiple quality checkpoints:
- First-article inspection (FAI): Full dimensional report (all features measured) on the first 5–10 parts off the die. Per AS9102 for aerospace, PPAP Level 3 for automotive.
- In-process monitoring: Sensors detect die damage, material feed errors, and tonnage variations in real time. Modern servo presses display force-displacement curves for every stroke.
- Statistical process control (SPC): Critical dimensions are measured at intervals (every 100–1,000 parts) and plotted on control charts. A Cpk ≥ 1.33 is the typical minimum for automotive; Cpk ≥ 1.67 for safety-critical features.
- Visual and go/no-go gauging: Operators check burr height, surface scratches, and dimensional pass/fail using fixed gauges at the press.
Cost Drivers in Metal Stamping
Understanding what drives stamping cost helps you make better sourcing decisions:
| Cost Factor | Impact | Optimization Strategy |
|---|---|---|
| Die tooling (one-time) | $5,000–$500,000+ | Simplify geometry, reduce station count |
| Material cost (recurring) | 40–70% of part cost | Optimize strip layout to reduce scrap |
| Press tonnage | $60–$200/hour | Right-size the press to the part |
| Secondary operations | $0.02–$1.00/part | Design features into the die |
| Tolerances | +30–100% for precision specs | Apply tight tolerances only where needed |
| Volume | Lower per-unit at higher volumes | Consolidate part families into one die |
Pro tip: The fastest way to reduce stamping cost is material utilization. A redesigned strip layout that improves material usage from 65% to 80% on a $2.00/part material cost saves $0.30 per part — $30,000/year on a 100,000-unit program.
Lead Times for Metal Stamping Projects
Typical timelines from design release to production parts:
| Phase | Duration | Notes |
|---|---|---|
| DFM review and quote | 3–5 business days | Provide 3D CAD (STEP) and 2D drawings with GD&T |
| Die design | 1–2 weeks | Progressive dies take longer than single-hit dies |
| Die manufacturing | 4–12 weeks | Progressive: 6–12 weeks; single-hit: 4–6 weeks |
| Die tryout and sampling | 1–2 weeks | First-article parts sent for approval |
| Production ramp | 1–2 weeks | SPC setup, operator training, run-at-rate |
| Total (typical) | 8–18 weeks | Rush projects: 4–6 weeks possible for simple dies |
Frequently Asked Questions
What tolerances can metal stamping hold?
Standard metal stamping holds ±0.10 mm on linear dimensions and ±0.05 mm on hole diameters. Precision stamping achieves ±0.025 mm on linear features and ±0.013 mm on holes, but at higher tooling and maintenance costs. Specifying tolerances tighter than ±0.025 mm typically requires secondary machining.
How much does metal stamping tooling cost?
Progressive die tooling ranges from $15,000 for simple 3–5 station dies to $250,000+ for complex 20+ station dies with in-die tapping or assembly. Single-hit or short-run dies start around $5,000. Tooling cost depends on part size, number of operations, die material (D2, carbide, or powdered metal), and expected die life (500,000 to 50+ million hits).
What is the minimum order quantity for metal stamping?
Most stamping suppliers require minimum order quantities of 5,000–10,000 parts to justify die setup and press changeover. For prototyping or short runs under 5,000 units, soft tooling (cast zinc dies or 3D-printed die inserts) or laser cutting with press brake bending is more cost-effective.
What materials can be stamped?
Almost any ductile metal can be stamped, including low-carbon steel, stainless steel, aluminum, copper, brass, phosphor bronze, titanium, and nickel alloys. Material thickness typically ranges from 0.1 mm to 6.0 mm. The key requirement is sufficient ductility — brittle materials like cast iron are not stampable.
How long does it take to make stamping dies?
Simple single-hit or transfer dies take 4–6 weeks. Complex progressive dies with 10–20+ stations take 6–12 weeks. Rush orders can sometimes be compressed to 3–4 weeks for simple tooling, but quality and die life may be compromised. Add 1–2 weeks for tryout, sampling, and first-article approval.
Conclusion
Metal stamping delivers high-volume, repeatable, and cost-effective production of precision metal parts. Whether you need 50,000 electrical contacts or 5 million automotive brackets, the right stamping process — progressive, transfer, or fourslide — matched to your material and tolerance requirements will deliver parts at a fraction of the cost of machining or fabrication.
If you are evaluating metal stamping for a new project, start with a DFM review and strip layout analysis. Getting the die design right from the start is the single highest-leverage decision in any stamping program.
Need a quote for stamped parts? Contact our engineering team with your 3D CAD files and 2D drawings for a DFM review and competitive quotation within 3–5 business days.