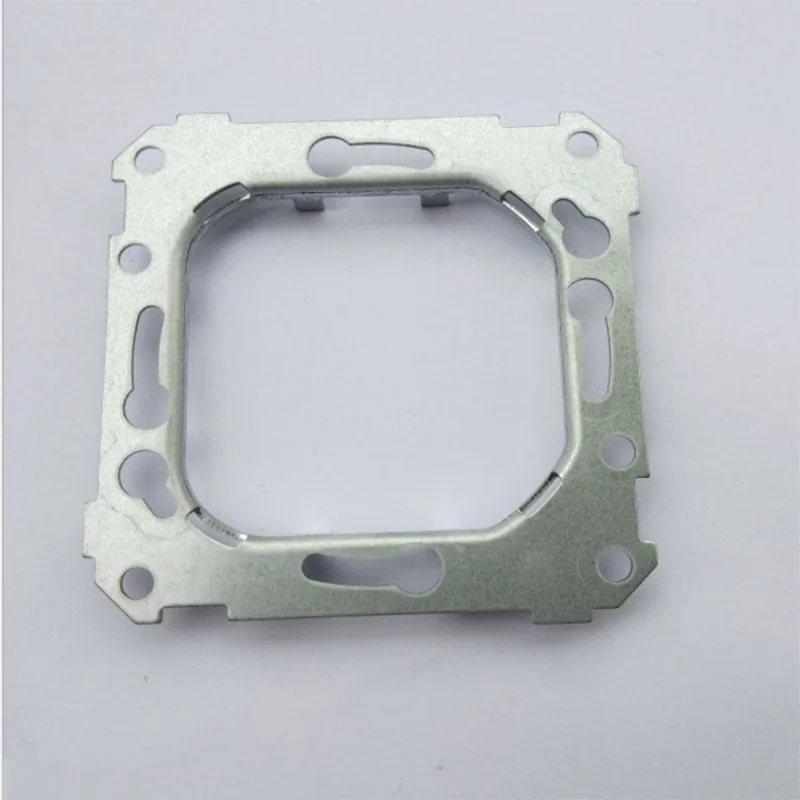
Blanking is one of the most fundamental operations in metal stamping. It converts flat sheet metal or coil stock into discrete parts — called blanks — by shearing the material along a closed contour using a punch and die. Whether you manufacture brackets, enclosures, electrical contacts, or automotive panels, the blanking process sets the foundation for part geometry, edge quality, and downstream forming operations.
This guide covers the mechanics of blanking, how it differs from punching, the major blanking methods available, material utilization strategies, common defects and their fixes, and the tonnage calculations you need for press selection.
What Is the Blanking Process?
In metal stamping, blanking is a shearing operation in which the desired part is cut out of the sheet and falls through the die opening as the finished piece. The surrounding material — the skeleton or web — becomes scrap. This is the defining characteristic that separates blanking from punching (piercing), where the removed slug is scrap and the sheet retains the hole.
How Shearing Works
When the punch descends and contacts the sheet metal, shearing progresses through four distinct phases:
- Elastic deformation — The material compresses slightly under the punch tip; no permanent shape change occurs yet.
- Plastic deformation — The punch penetrates into the material, initiating a burnished (smooth) cut band on the side closest to the punch.
- Fracture — Cracks originate at the punch and die cutting edges and propagate inward. Where the two fracture zones meet, the material separates.
- Separation — The blank clears the die opening. Ejector pins or strippers push the part or skeleton free.
The resulting cross-section of a blanked part shows four characteristic zones: the rollover (shear band at the top), the burnish zone (smooth vertical band), the fracture zone (rough angled surface), and the burr (thin, sharp lip at the bottom edge).
Clearance: The Most Critical Parameter
Die clearance — the gap between the punch cutting edge and the die cutting edge measured per side — directly controls edge quality, burr height, and tool life.
| Clearance per side (% of material thickness) | Typical result |
|---|---|
| 3–5 % | Tight fit; minimal rollover; higher punch wear; used in precision blanking |
| 5–8 % | Standard for most steels; good burnish-to-fracture ratio |
| 8–12 % | Wider gap; larger rollover and burr; lower tonnage; suitable for softer aluminum alloys |
| > 12 % | Excessive burr and deformation; generally unacceptable for production |
Rule of thumb: For mild steel (up to 3 mm thick), use 5–7 % clearance per side. For aluminum, 6–8 %; for stainless steel, 7–10 %. Always consult material-specific guidelines and test on sample blanks before committing to production tooling.
Burr direction in blanking is predictable: the burr always forms on the scrap side — the side opposite the punch. In blanking, the burr is therefore on the bottom edge of the finished blank (the die side). If a burr-free edge is required on a specific surface, orient the part in the die accordingly.
Blanking vs. Punching (Piercing): What’s the Difference?
The terms are often confused, but the mechanical distinction is straightforward:
| Feature | Blanking | Punching (Piercing) |
|---|---|---|
| Goal | Produce the cut-out piece as the finished part | Create a hole in the sheet; the slug is scrap |
| Useful part | The piece that falls through the die | The sheet that remains on the die |
| Die profile | Shaped to the part outline | Round or shaped to the hole geometry |
| Punch profile | Follows the part outline (slightly smaller due to clearance) | Matches the hole shape |
| Scrap | The skeleton (web) remaining on the strip | The punched-out slug |
| Typical application | Flat blanks, brackets, gaskets, shims | Mounting holes, ventilation slots, access cutouts |
In progressive die stamping, both operations often occur on the same strip in different stations — blanking at the final station, punching at earlier ones.
Types of Blanking: A Comparison
Not all blanking operations produce the same results. The choice of method depends on part tolerances, edge quality requirements, production volume, and cost constraints.
Conventional Blanking (Standard Blanking)
The most common method. A single punch shears through the material with standard clearance (5–8 % per side). The fracture zones from punch and die sides meet at an angle, creating a visible break line on the cut edge.
- Tolerances: ± 0.1 – 0.3 mm (typical for steel)
- Edge finish: Moderate; burnish zone = 30–50 % of material thickness
- Speed: High; 100–800+ SPM on high-speed presses
- Cost: Low tooling cost; lowest per-part cost at high volume
- Best for: General-purpose parts where the blanked edge is not a critical surface
Fine Blanking (Precision Blanking)
Fine blanking uses a triple-action press: a V-ring (stinger) indents the sheet to prevent material flow, a counter-pressure pad holds the blank flat, and the punch descends with very tight clearance (0.5–1 % per side). The result is a full-sheared edge with nearly 100 % burnish and minimal rollover.
- Tolerances: ± 0.02 – 0.05 mm
- Edge finish: Excellent; 90–100 % burnished; burr height < 0.05 mm
- Speed: Lower; 20–80 SPM
- Cost: High tooling cost; specialized press required
- Best for: Gear blanks, sprocket plates, automotive seat components, parts requiring machined-edge quality without secondary operations
Progressive Blanking (Progressive Die Stamping)
The blank is formed through multiple stations on a single progressive die, each performing a specific operation (punching pilot holes, notching, forming, and finally blanking). The strip is indexed forward by a pitch equal to the station spacing.
- Tolerances: ± 0.05 – 0.15 mm (station-dependent)
- Edge finish: Same as conventional for the blanking station; can incorporate forming and coining
- Speed: 100–1000+ SPM
- Cost: High die cost; lowest per-part cost at very high volumes (> 100,000 parts)
- Best for: High-volume complex parts; components requiring multiple operations in one pass
Comparison Table
| Parameter | Conventional Blanking | Fine Blanking | Progressive Blanking |
|---|---|---|---|
| Edge quality | 30–50 % burnish | 90–100 % burnish | 30–50 % burnish (blanking station) |
| Dimensional tolerance | ± 0.1–0.3 mm | ± 0.02–0.05 mm | ± 0.05–0.15 mm |
| Burr height | 5–15 % of thickness | < 3 % of thickness | 5–15 % of thickness |
| Press type | Mechanical/hydraulic | Triple-action hydraulic | High-speed mechanical |
| SPM range | 100–800+ | 20–80 | 100–1000+ |
| Material thickness | 0.3–12 mm | 0.5–16 mm | 0.3–6 mm |
| Tooling cost | Low–medium | High | High |
| Per-part cost | Low | Medium–high | Very low (high volume) |
| Best volume range | 10,000–500,000+ | 5,000–500,000 | 100,000–millions |
Material Utilization and Nesting Optimization
Material cost is typically 50–70 % of a stamped part’s total cost. Optimizing the blank layout (nesting) on the strip is one of the highest-leverage activities in blanking.
Key Nesting Strategies
- Row nesting — Parts aligned in straight rows across the strip width. Simple to design; utilization typically 55–70 %.
- Staggered nesting — Alternating rows offset by half a part pitch. Increases utilization by 5–15 % over row nesting for rectangular or elongated parts.
- Rotational nesting — Parts rotated at optimal angles (often 30°, 45°, or custom) to maximize the number of parts per strip. Irregular shapes benefit most from this approach.
- Common-line blanking — Adjacent parts share a single cut line, eliminating the web between them. Can add 10–20 % utilization, but requires careful tooling design and may increase die wear at the shared edge.
- Scrap-free (skeleton-free) blanking — Used for continuous strips of identical parts (e.g., electrical contacts) where the skeleton is minimized or eliminated.
How to Calculate Material Utilization
Material utilization (%) = (Total blank area per strip / Strip cross-section area) × 100
Or equivalently:
Utilization (%) = (Number of blanks per stroke × Single blank area) / (Strip width × Pitch) × 100
A target utilization of 70–85 % is achievable for most geometries with proper nesting. Below 60 % warrants a tooling or layout redesign.
Practical Tips
- Involve tooling engineers early — a small geometry tweak (adding a radius, adjusting a corner) can unlock a more efficient nest.
- Consider coil width constraints — standard coil widths (e.g., 300 mm, 600 mm, 1000 mm) may yield better pricing than custom-slit widths.
- Use nesting software (e.g., Sigmanest, Lantek, AP100) for complex shapes to evaluate dozens of orientation angles quickly.
Common Blanking Defects and Solutions
Even well-designed blanking operations can produce defects. The table below covers the most frequent issues, their root causes, and corrective actions.
| Defect | Appearance | Root Cause | Solution |
|---|---|---|---|
| Excessive burr | Sharp, raised lip on blank edge | Worn cutting edges; excessive clearance; material too soft | Re-sharpen punch and die; reduce clearance; use harder tool steel or coatings |
| Rollover (die-side rollover) | Curved depression at blank entry edge | Excessive clearance; insufficient material hold-down; soft material | Tighten clearance; increase blank holder force; add V-ring for fine blanking |
| Fracture zone roughness | Jagged, uneven fracture band | Clearance too tight (cracks don’t meet cleanly); incorrect material grain direction | Optimize clearance; rotate part orientation relative to rolling direction |
| Edge cracking | Cracks radiating from blanked edge into the part | Material brittleness; burr side under tension in subsequent forming; sharp blanked edge acts as crack initiator | Deburr before forming; orient burr side to compression zone; use fine blanking for critical edges |
| Dimensional variation | Inconsistent blank size across production run | Tool wear; press deflection; strip feeding inconsistency | Implement scheduled tool maintenance; verify press alignment; inspect feeder accuracy |
| Twist / bow | Blank warps or twists after blanking | Uneven clearance; asymmetric punch geometry; residual stress in coil stock | Re-center punch and die; check for tool parallelism; stress-relieve material before blanking |
| Slug pulling | Scrap slug retracts into die on upstroke | Vacuum under punch; insufficient stripper force; insufficient clearance | Add vacuum break ports; increase stripper spring pressure; apply slug-retaining coatings to punch face |
| Galling | Material smearing on punch/die surface | Adhesion between tool and workpiece; insufficient lubrication; wrong tool steel grade | Apply TiN/CrN coatings; use carbide tooling; increase lubricant flow rate |
| Die chipping | Small fractures on die cutting edge | Impact fatigue; incorrect die steel hardness; clearance too tight for hard material | Use tougher die steel (e.g., D2 to M2 transition); add entry taper to die; optimize clearance |
Tonnage Calculation for Blanking
Correctly calculating the required press tonnage is essential for selecting the right press and avoiding under- or over-tonnage problems (part defects, press damage, or wasted energy).
Standard Formula
Blanking force (tons) = (Perimeter × Thickness × Shear strength) / 2000
Where:
– Perimeter = total length of the cut contour (inches)
– Thickness = material thickness (inches)
– Shear strength = material shear strength (PSI)
– 2000 = conversion factor (2000 lbs = 1 ton)
Metric Version
Blanking force (kN) = Perimeter (mm) × Thickness (mm) × Shear strength (MPa) / 1000
Shear Strength Reference Values
| Material | Tensile strength (MPA) | Approximate shear strength (MPa) |
|---|---|---|
| Mild steel (AISI 1008–1020) | 300–420 | 250–350 |
| Stainless steel (304) | 515–620 | 400–500 |
| Aluminum 5052-H32 | 228–275 | 150–185 |
| Aluminum 6061-T6 | 290–310 | 200–220 |
| Copper C11000 | 210–380 | 170–250 |
| Brass C26000 | 300–400 | 220–300 |
Tip: As a conservative rule of thumb, shear strength ≈ 0.6 × tensile strength for most ductile metals.
Adding Safety Margin
Always add a 20–30 % safety factor to account for:
- Material property variations (heat-to-heat)
- Blunt tooling between resharpening
- Strip feeding misalignment causing partial cuts
- Simultaneous forming operations (if combined with blanking)
Example calculation: Blanking a 100 mm × 50 mm rectangular blank from 2 mm mild steel (shear strength = 300 MPa):
Perimeter = 2 × (100 + 50) = 300 mm
Force = 300 × 2 × 300 / 1000 = 180 kN
With 25 % safety margin: 180 × 1.25 = 225 kN ≈ 23 tons
Tonnage Reduction: Shear Angles
Adding a shear angle (rake) to the punch or die staggers the contact line across the material, reducing peak tonnage by spreading the cut over time. A shear angle of 1°–3° per side (equivalent to 5–15 % of material thickness across the punch face) can reduce peak tonnage by 30–50 % without affecting blank geometry.
Best Practices for Production Blanking
- Specify the burr side on the drawing. Since burr direction is predictable in blanking, add it to the part drawing so operators orient the die correctly.
- Schedule tool maintenance by stroke count. Edge wear is gradual; schedule resharpening every 50,000–200,000 strokes (material and coating dependent) rather than waiting for visible defects.
- Use coated tooling for abrasive materials. TiN, TiAlN, and CrN coatings can extend tool life 2–5× when blanking stainless steel, high-strength low-alloy (HSLA), or galvanized stock.
- Control coil flatness. Wavy or cambered strip causes inconsistent clearance across the cut, leading to variable burr height and blank size. Level the strip before the blanking station if needed.
- Monitor blank weight as a quality proxy. Weighing a sample of blanks each shift is a fast, non-destructive check for dimensional drift or tool wear.
Frequently Asked Questions
What is the difference between blanking and cutting in sheet metal?
Blanking is a specific shearing operation where the punched-out piece is the desired part and the surrounding sheet becomes scrap. Cutting is a broader term that includes blanking, punching, trimming, and slitting. In blanking, the die opening matches the part shape; in punching (piercing), the die matches the hole shape and the slug is discarded.
How is blanking clearance calculated?
Blanking clearance is expressed as a percentage of material thickness, measured per side between the punch and die cutting edges. For example, with 2 mm thick steel and 6 % clearance per side, the gap is 0.12 mm on each side. The formula is: Clearance per side = Material thickness × (Clearance % / 100). Typical values range from 3–12 % depending on material and quality requirements.
What is fine blanking used for?
Fine blanking is used when a part requires a full-sheared, nearly burr-free edge without secondary machining. Common applications include gear blanks, sprocket plates, automotive seat recliner components, and precision flat parts where edge quality directly affects function or assembly. Fine blanking produces edges with 90–100 % burnish and burr heights under 0.05 mm.
How do I reduce burr height in blanking?
To reduce burr height: (1) sharpen or replace worn punch and die edges, (2) optimize clearance to 5–7 % per side for most steels, (3) use coated or carbide tooling to maintain edge sharpness longer, (4) ensure proper material hold-down to prevent the sheet from lifting during the cut, and (5) consider fine blanking if the application demands near-zero burr.
What press tonnage do I need for blanking?
Calculate tonnage using the formula: Force = (Perimeter × Thickness × Shear strength) / 1000 (in kN, metric) or / 2000 (in tons, imperial). Always add a 20–30 % safety factor. For example, blanking a 100 mm × 50 mm part from 2 mm mild steel requires approximately 225 kN (23 tons). The press must also have sufficient stroke length, bed size, and speed for your production requirements.
Need precision-blanked parts engineered to your specifications? Contact Metal Stamping Parts to discuss your blanking requirements — from prototype to high-volume production, with in-house tooling and quality-certified manufacturing.